7/30/2012

Electric Pineapple and Mr. Bubble

I couldn't figure out a clever name for this cute look so I combined them with an "and". So creative! I love this look. I really like the CG Electric Pineapple! It matches my fav Coach purse :)

July Glossybox

So I got my second Glossybox a few days ago. I was so excited and tore it open before I got to the house. I love these sample subscription boxes.

7/27/2012

Sizzling Sunset

I made a new polish today :) My sister named this one Sizzling Sunset. It is a deep orange holo with square iridescent (green to orange) glitter in a light orange jelly. I actually put my polish over Kleancolor Metallic Orange though it looks great on its own. I actually think it looks better on its own. I have a pic of it towards the bottom of the post.

7/26/2012

My new car and Dreamy Bikini

I've been so busy the last 2 days that I haven't had a chance to really do much with my nails. I just bought a car and have been occupied with getting everything sorted out. First thing now is to get the windows tinted!

So this is my mani right now...

I have 2 coats of Essie Bikini So Teeny and 2 coats of Lush Lacquer Dreamsicle. This combo works well together. 


Photobucket

7/25/2012

"Creating Your Own Nail Transfers" by NailNerd

I'm excited to try this. I just need to get a few items first. I am pretty sure drawing on a flat surface will be a lot easier for me... Anyways, check this out :)

Here’s the basic trick of it:

1.  Lay down a couple of layers of clear coat on a section of parchment paper. You want it to be thick enough to really hold everything together, and will need a decent buffer between your art and the paper; not enough and your stuff could crackle/stretch/morph later when you add more polish underneath.
2.  Paint in whatever design you want!  I just used black acrylic paint to swipe in some quick little birdies for this, but you can do… anything.  Use polish, use acrylic paint, glue in some stones or feathers or whatever, this is your canvas.  NOTE: stay away from papers.  I know, I know, it’s super tempting to just slide a picture or a magazine cutout in there to look cool, but I’ve never seen a printed paper surface respond well/look good after being slathered in nail polish (tested this out ages ago and the paper surface would sort of… dissolve into this weird texture like it was disintegrating and the colors completely changed, it just looked like crap).
3.  Once that’s dry, you can throw another clear coat over it to seal it — good idea for acrylics, not so necessary if you just worked in nail polish.
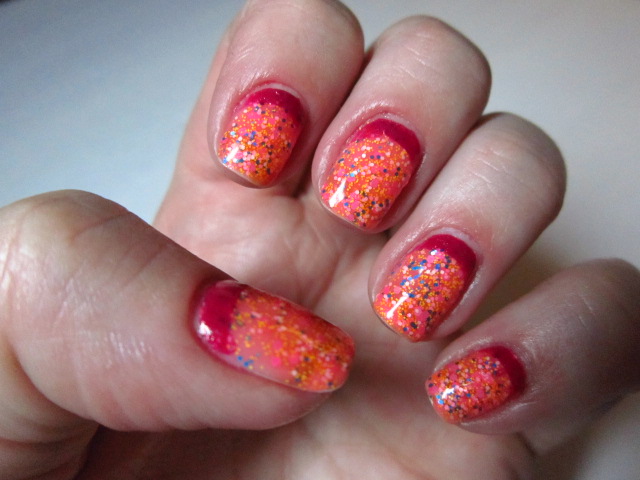
4.  Put a thin coat of polish on your nail.  I use the cheapo Wet n Wild topcoat because I know it’s thin and dries pretty fast.  The base on this manicure is two days worth of wear on ULTA Alter Ego (I like this polish much more than I thought I would in the bottle, it’s really pretty and looked great in two coats).
5.  While that’s drying, peel (and cut if you want) the polish off of the parchment paper.  Because my little design is small and the polish is all clear, I just used a general shape, but if you’ve loaded up a ton of color and want to avoid more cleanup later you can cut the polish down to size.
6.  It should have been about a minute since you put the clear coat down on your nail so that now it’s more tacky than wet — that’s the ticket.  You want the polish to have oomph enough to grab onto your homemade decal, but not so wet that it won’t ever dry sandwiched in between there with no air.  Now you’ll take your decal, drop it on your finger (like you would with the foils) and start rubbing it down and in to seal it to your nail.  You may be tempted to tug at and clean the edges right now:  DON’T.  Wait til everything is completely dry.  These nail transfers are all dry anyway so it’s not like it’s making a huge mess, though you may notice some color bleeding in the corners of your nails where the wetter polish is settling in.  But if you start trying to clean right away while the sandwich layer is still wet you may end up pulling pieces from the corners or morphing your design; treat your fingers like you would if you had just polished your nails a couple of minutes ago and they still need to set: no knocking, scratching, bumping, hard pressing, etc.
DIY nail decal
ULTA Alter Ego
7.  Go in with a Q-tip or flat nail brush and some polish remover once it’s dry to strip the excess off of your hands and clean up the edges.  Finish it up with a good topcoat (like Seche Vite) to seal it all down (don’t forget to wrap the tips!) and you’re all set!
blue bird nails
Cool, right?  And maybe this has been done elsewhere before but it’s the first I’ve stumbled on the technique and am super excited to use it for my left hand and friends.
PROS:
  • Makes it easy to create designs in advance
  • Gives you the ability to work on something for hours without rendering your hand useless
  • Full designs for your dominant hand!
CONS:
  • Probably won’t last as long as a manicure that’s conventionally built up on your nail
  • Edges may not be perfect/can be a pain in the butt with full-cover designs
  • I realized in testing this that I do a LOT of my brush work by moving my hand instead of the brush, so I’m actually more used to and comfortable with painting directly on the nail
  • Because you’re not painting on the nail, placement and positioning becomes a little hit-or-miss depending on how good you are at eyeballing
And oh yeah, this time I actually went the extra step and captured a video of me doing this in case it’s confusing — don’t expect these a lot, but hopefully it’s helpful!

How to Create Nail Decals


Photobucket

7/23/2012

Lazy Days of Summer 5 - Inspired by your favorite towel

I am pretty far behind on this challenge. At least I think I am. This is day 5 and the theme is inspired by my favorite towel. I have a cute beach towel that is striped with bright summery colors, black, and white.

7/22/2012

A new franken... Silverflake

So I have read that polish with flakes of gold is one of the new trends. Well I'm not a gold fan so I made a silver flake polish. I was just playing around when I made this. I absolutely love the look. So I bought the gold foils for a gold version. I was thinking of possibly selling a few.


This is one coat of Silverflake over two coats of WnW Black Creme. One coat of SV on top.
It took some time to make the silver flakes. I did it by hand with cuticle scissors while watching 21 Jump Street... the movie. I have to say the movie also rocks :)


Photobucket

New Lush Lacquer Swatches


After I received my beauties from Lush Lacquer, I went and ordered more. Six More! Of course all six are very pretty. The shipping was still slow for these. I received them almost 3 weeks after placing the order. I still think the wait was worth it :)


7/20/2012

I Love Jelly Sandwiches in the Afternoon

My first jelly sandwich! I think it looks cool as hell. I had issues choosing the glitter polish to use. I actually tested a few out prior to applying it to my nails. :)  

7/19/2012

Mysterious Technicolor

So I bought some clearance polishes from Sally's and had to use one of them immediately. I got Orly Mysterious Curse for $3.99. I think it was a deal considering how awesome it is! I don't usually buy polishes from Orly but they do have some nice ones.

7/18/2012

My July Glam Bag

I am excited for everything in this month's bag... including the cute bag! I think the stuff inside is more suited for me than the other bags I've gotten. It might be because I have a huge love for the beach and that's the theme this month. I def can't complain at $10/month!

7/17/2012

You Mix glitter update


This is an email I received today. It is also posted on their site. I'm sad because they have great glitter. I especially love the pastel glitter mix. I think this is going to cause issues in the indie polish world. I hope everything works out for everyone affected. 


Dear You Mix Fans,


We have been getting a lot of questions about when certain glitters will be back in stock and have been running around like crazy trying to keep all of our product constantly available to keep up with demand, with not much luck in doing so.  After much deliberation on the matter we have made up our minds how to better assess the situation and have this to say:

When we first started this business, it was a goal to provide solvent resistant glitters for all those desperately seeking quality glitters for their polish making. Since we have started, we have grown and been able to find more products to make available to you. It has only been through the support and love of many that we have been able to take it this far and we thank you. However, we realize we have been failing at meeting the demand and disappointing many of our amazing customers with little or no available stock on the site for the majority of the time. We feel terrible we have let this happen. This is not what we ever wanted nor what our customers deserve. For this reason we have decided to overhaul our business model and start anew. This was a difficult decision to come to as we do not want to lose our customer’s faith in us. But even more than that, we do not want to become a company who’s customers have to constantly stalk restocks for products they want. We think you will much prefer our new way of doing things.


So where do we go from here? We will be adding what we have left of product soon and have a clearing inventory sale. After this time, there will be a small break where we will be doing preparations to re-open. Although we are simplifying and not all our product will be carried over at this time, we will have better prices, more availability, and quicker turn around for shipping. As we grow, we will only add on new products as we can handle them or acquire the help to do so. We apologize for the mistakes we have made and we only hope to learn from those and build a better business to serve our customers. You guys are the reason we have a business and we thank you for all the feedback and support you have given us thus far. We hope to see you stick around once these changes do come into place because we truly enjoy working with you!

Thanks,

Amber and Dustin


Photobucket

7/16/2012

Blu-lite

So here is another franken I made last night. I decided to try out my glow in the dark glitter again. I think the red has an odor that is not pleasant. I wasn't sure if the other glitters would work but you never know unless you try. It is a nice, bright blue so I called it Blu-lite.

7/15/2012

Recent road trip with sis

So I decided to go on a road trip with my sister. I had to wake up super early... well early for me. We drove north to see some beaches and a lighthouse in Neah Bay. My camera died on the hike to the lighthouse viewing area. I missed out on taking pics of a couple of bald eagles, caves, and starfish. :( My sister got a lot of pics of everything using her awesome DSLR camera. I did manage to get a crazy sunburn... convertible car = seatbelt tan line.

Neon purple and pastel love

So I officially started making my own polish creations. I have to say I did a good job on this one :) You gotta love pastels and hearts. I was going to put it over white but I'm not a huge fan of white nails. I do have to say this polish works best over white. I'll throw some swatches on a new page I'm making just for these.

My July Birchbox

So this month Birchbox collaborated with Glamour. The theme is see it, hear it, taste it, touch it, and smell it. I received 6 items that correspond with the theme.

Lazy Days of Summer 4 - Flip Flops

So it is now time to concentrate on this challenge. When I lived in Las Vegas, I lived in flip flops. I had over 20 pairs of flip flops! I decided to paint the flip flops to something that resembles ones I have or had.

7/12/2012

The Summer Fun Challenge Day 8

So here we are at the last day of the Summer Fun Challenge. I gotta say I had a lot of fun doing this :) This last day is all about Summer Fun. I have been patiently waiting for Day 8 to come around. 


Floam and Spun Sugar Funness! I completely love this mani. I wanted to do something new so I was looking at different techniques and ran across the spun sugar technique. I knew I would be doing this but it wasn't until yesterday that I knew exactly how things were gonna mesh. 

7/11/2012

Forget You & Break Up

After my late night/early morning doing 3 different nail looks, I decided I wanted something pretty and easy. This was both but not quite what I had imagined. It is hiding too much of my Lippmann !

7/10/2012

The Summer Fun Challenge Day 7

So this week's theme is your favorite piece of summer fashion. My absolute favorite is flip-flops but I already have to do a nail look for them so I am going to do swim suits. I found a cute look by Robin Moses and decided it would be my inspiration.

Lazy Days of Summer 3- Flag Day

SO... here is my Flag Day mani. I should have been wearing this a week ago but it's been super busy. No that I have a bit of extra time, I'm playing catch up. I almost had to redo this one but I decided the stars still looked nice. I have come to realize that Kleancolor Neon Sapphire bleeds badly! The stars were perfect and white until I added the top coat.

7/09/2012

Pink Panther Matter

After failing miserably at doing a mani (I was tired and not seeing straight), I decided to show off another one of my polishes from Lush Lacquers. I decided to put it over gray so here it is... It's a nice, simple, cute look! 


All I can say is wow...

While browsing through eBay, I found these Lynnderella polishes already at an obnoxious bid with just under 5 days left of the auction.

Deep Blue Seeing - $103.62
I Don't Mean Rhinestones - $82.12
Kabbalah Bracelet - $104.05
Salad Days - $103.62
Pentimento - $71.00


These are all from one seller too. I know she makes some nice polish but not that nice!!!


Photobucket

Half dutch braid headband video tutorial

So I found this super cute hairstyle while looking up different braids. I am still trying to do a french braid. I know it is silly but somehow I mix it all up.


The end result for this video is not what I would do to finish it off. I might do a messy bun or hide the braid in my hair.

I found this video along with a few others from this site... http://www.totalbeauty.com/content/gallery/braid-video-tutorials


Photobucket

7/07/2012

Cutting Brushes for nail art by Robin Moses

So I'm pretty new to using brushes to do nail art. I thought I would share this video from Robin Moses with others who would like to learn. This video shows how to cut down a brush to make a more precise point.


I think Robin Moses is very talented. She posts video tutorials on Youtube 3 times a week. You should check her stuff out.


Photobucket

Summer Lovin Ruffian

So I am sporting one of my new Lush Lacquer polishes. I have to say I love it! Initially, I painted the glitter polish on to match this super cute pink and yellow plaid skort I was wearing. So that night I thought I would try doing a ruffian which I think looks cool. I'm not sure if I succeeded but I do like the way my nails look.

7/05/2012

The Summer Fun Challenge Day 6

Here is my "The Big Blue" look. I was going to do all waves and add a surfer but that seems a bit boring. So I found a bunch of stamping images to use. I almost used a dolphin instead of the shark but I wanted to add a bit of fear in it. The ocean isn't all happy n stuff. Anyways, hope you guys like it. I added a video tutorial of creating the wave on my thumb so check it out :)

My Lush Lacquers and Floam swatches

I haven't swatched anything in a long time so here are my 4 new Lush Lacquer minis and Floam. All of these polishes are amazing!  The girls at Lush Lacquer have made some cute polishes... I love all of them. I bought a 4 mini set for a really good price. I think buying minis is the best way to buy polishes for the first time. I know I'll be buying full size of a few of these. Here is the link to their Etsy shop... Lush Lacquer. I got the Floam from Ninja PolishI still can't believe how cool Floam looks in person. Amy from Nail-venturous also does a great job at creating polish that is sought after regularly. I am excited to wear these soon. Check these lovelies out...

7/04/2012

The Summer Fun Challenge Day 5

I was sooooooo frustrated with this challenge. I had this great idea that doing map nails would be cool and easy. WRONG!!! I tried a few different maps to transfer on to my nails and all I did was make a mess. I haven't ever done newspaper nails either. That is why this is coming in later than usual. 

My June Glossybox

So I got my first Glossybox yesterday and I have to say, I'm a bit disappointed because it wasn't full of makeup stuff. It wasn't bad though... I do like the box. It is more heavy duty and a lil bigger that the Birchbox box. Both come with items wrapped in tissue paper and tied with ribbon. I like how it really feels like getting a present. You never know whats in that tissue paper.

Lace-y Nude

I know I should be posting my week 5 nails for my Summer Fun challenge but I have run into issues with my original design idea and have to do something else. That is why my nails are nude! Today is my Dad's and best friends birthday... Happy Birthday Dad and Alisa!!! Anyways, sorry about the wrist brace I forgot to take it off and didn't feel like taking new pics.

7/01/2012

Lazy Days of Summer - Summer Ombre

Well here is number 2 on my Lazy Days of Summer challenge. I actually meant to post this yesterday but got busy putting my new drawer unit I bought from Ikea together for make-up storage. It is big and heavy and decorated with some vinyl butterflies and design. I'm so crafty sometimes. Anyways, now that I went way off subject... 

Corroded nails

So I was just playing around with colors and my fan paint brush and stumbled upon this look. I used four different colors and brushed them while they were still wet. I did one finger at a time. I think they look similar to a corroded penny but there is a little bit of blue in there.